Cookie
Electronic Team uses cookies to personalize your experience on our website. By continuing to use this site, you agree to our cookie policy. Click here to learn more.
f

Best app to arrange Google sync for Mac

Google app sync Mac: 2021 top solutions

SyncMate logo
Top choice

SyncMate

4.5 Rank based on 795+ users, Reviews(476)

If you’re a Mac user then hopefully you already know the importance of regularly synchronizing your data between your Mac and your Google account. If not (or if you’re wondering “What is Google sync?”) we’re here to fill you in on why it’s important and the best ways to do this. Syncing your Mac and your Google account ensures you always have the most up-to-date information across all your devices, creating secure backups of your important data like your photos, contacts, and calendar. Should your Mac be lost, stolen, or damaged, you’ll always have a backup of your data in the Google cloud, so your most precious data is safe. Not to mention, you’ll be able to access your most important data wherever you are, on any device, if you regularly sync your Google account and your Mac.

I. Sync Google Drive with Mac - Top 3 Ways

So why might you need to sync Google Drive with Mac? Performing a Google Drive sync when you need to send the most up-to-date version of a document to your Mac for an important meeting, or ensure your calendar is updated is one of the most common scenarios. You might want to backup your contacts or sync Mac with Google Drive to ensure the photos you took on holiday are safely backed up. Or perhaps you need to sync Google Drive with Mac to copy across your bookmarks so you can access them at home and at the office. Whatever your reasons for needing to sync Mac with Google Drive, there are a number of ways to do this. Let’s take a look at the top 3 ways to sync Google Drive with Mac.

1. Sync Google Drive on Mac with SyncMate

SyncMate logo

SyncMate Expert


Requirements: macOS 10.13+. 60.62MB free space. Version 8.7.527. (5 Dec, 2023). 4.5 Rank based on 795+ users, Reviews(476)
Category: Utilities

SyncMate is a powerful, professional tool that’s designed to make syncing any device with your Mac (including Google Drive) quick and easy. You can sync your contacts and calendar for free, but you’ll need to upgrade to the Expert edition to sync any other data.
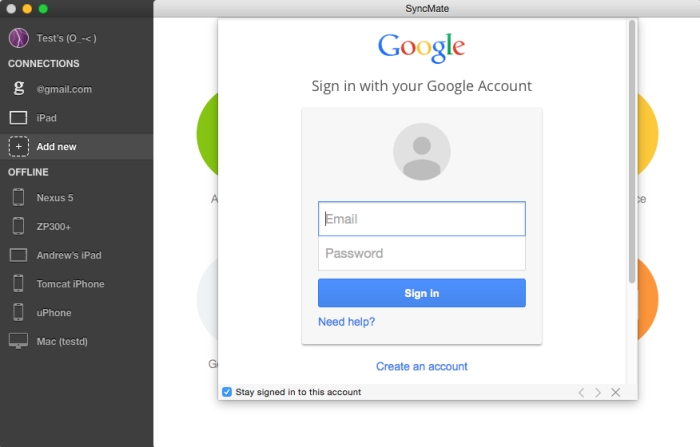
sync Google Drive

Here’s how to use SyncMate to sync Google Drive with Mac:

  1. Download and install SyncMate. You may need to upgrade to SyncMate Expert edition to sync Google Drive with Mac, depending on what data you’re syncing.
  2. Launch SyncMate and in the main window left panel, click “Add New”.
  3. Choose the device type - in this case, “Google Account” and enter your login and password.
  4. Once your account is connected, select “Connection Settings” to adjust them.
  5. That’s it! You’re now ready to sync contacts, pictures, music, calendar, and other folders between your Mac and Google Drive.

SyncMate takes care of everything, so all you need to do is select what you want to sync, sit back, and let SyncMate do the hard work - it should only take a few minutes.


2. How to Sync Google Drive to Mac Manually

If you don’t want to download and install SyncMate, you can sync Google Drive to Mac manually, although this is a little more complicated.
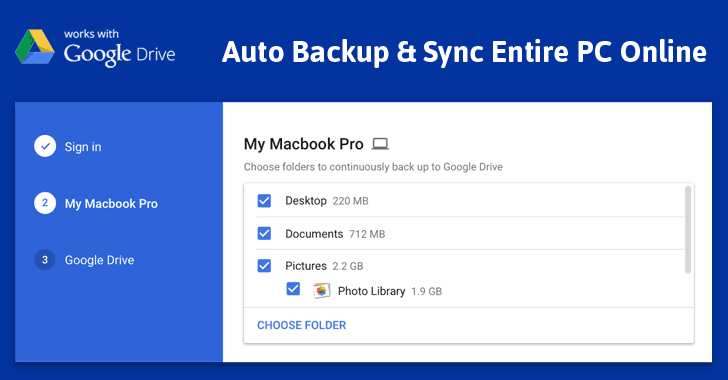
Google Backup and Sync software


Follow the steps below to perform a manual Google Drive sync to Mac:

  1. First, you’ll need to download and install the Google Drive app for Mac.
  2. Click on the Google Drive icon in the menu bar and in the dropdown, click the vertical ellipsis in the top right and choose “Preferences”.
  3. Adjust your settings to set up what you want to sync in the “My Mac” tab, or change your storage settings in the “Settings” tab.

That’s it - now Google Drive will automatically sync with your Mac according to your settings.

3. Try FreeFileSync to Sync your Google Drive

There’s a third way to sync your Mac with Google Drive: FreeFileSync. Here’s how to sync your Google Drive with Mac using FreeFileSync:
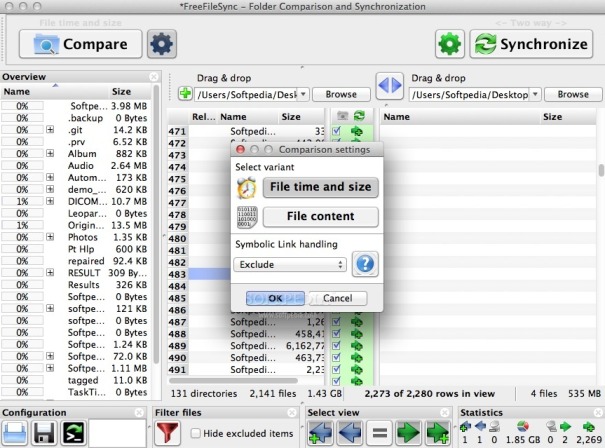
FreeFileSync app


  1. Download and install FreeFileSync.
  2. Launch the software and in the main window, drag and drop the folder you want to back up onto the left-hand side (under “Relative Path”). Then do the same for the folder you want to back up to, in this case, Google Drive, dragging and dropping it onto the right-hand side of the window.
  3. Click “Compare” at the top and choose the Mirror sync option.
  4. Select any files you don’t want to back up and click “Exclude via filter”.
  5. Click “Synchronize” then “Start” to start the sync.

This software is free and simple to use.

II. How to Sync Google Photos to Mac

You might not want to sync all your Google Drive data to your Mac - what if you just want to sync photos? Perhaps you have photos you want to sync to your Mac for sharing via email or maybe you just want to keep a backup of photos on both your Google Drive account and your Mac. You might even be working on editing photos and need to sync them from your Google Drive to Mac so that you have copies on your Mac and in the cloud. There are a few ways to do this, and we’ll show you some of the best.

1. The Fastest Way to Sync Google Photos with Mac

We recommend SyncMate as a professional, reliable one-stop solution to sync Google photos to Mac. You’ll need to download and install the software, then upgrade to the Expert edition to sync your photos.
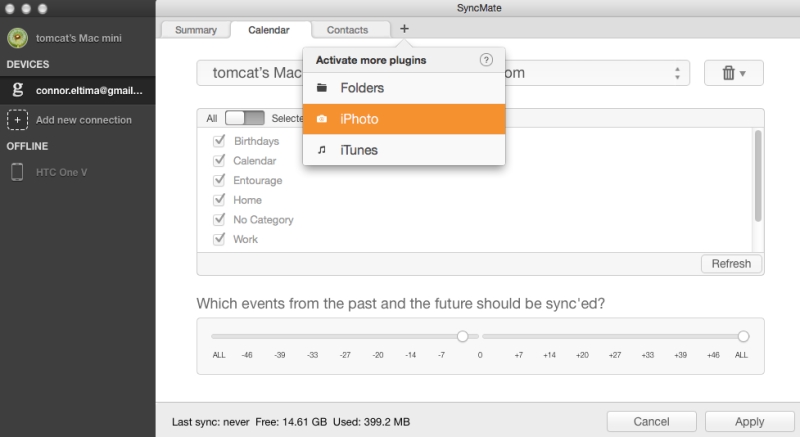
sync Google photo


Then follow the steps below to sync Google photos with Mac:

  1. Launch SyncMate and in the main window, click “Add New” from the left panel.
  2. Select your device - your Google account, in this case.
  3. Log into your Google account.
  4. Open the Photos plugin.
  5. Choose your sync pair - in this case, choose the local folder with images on your Mac, and then choose your Google Drive folder.
  6. Set the sync direction and tune the conversion settings if needed.
  7. Select the sync pair from the list and click “Sync”.

SyncMate takes care of all the hard work, so you can sit back and wait as your photos seamlessly sync from Google Drive to Mac. The whole process is simple and stress-free, and should only take seconds, depending on how many photos you have.

2. Sync All Google+ Photos to Mac Step-by-Step

If you prefer to sync Google photos to Mac manually, you’ll need to first ensure you have the Google Drive app installed on your Mac. Then follow these steps:

  1. Download and install the Google Photos uploader.
  2. Open Google Photos in your browser, go to settings, and ensure the “Google Drive” toggle is on.
  3. Open Google Drive in your browser and select “Google Photos”.
  4. Ensure the new Google Photos folder in your Google Drive is checked in your Google Drive Mac sync software settings.

Note: You should only need to set this up the first time you manually sync Google photos to Mac. From now on, your photos will automatically sync from Google photos to your Mac, and vice versa.

3. Use Google’s “Backup & Sync” Desktop App

Our third way of syncing Google photos to your Mac is using Google’s Backup & Sync Desktop App. Follow the below steps to do this:

  1. Download and install Google’s Backup & Sync app for Mac.
  2. Launch the app, sign into your Google account, and select the folders you want to sync to the cloud.
  3. Google app sync for Mac will run in your menu bar, automatically checking for new photos and uploading them to the cloud.

Although this is a quick and easy way to sync Google photos to your Mac, those who are less tech-savvy may prefer to use a professional tool like SyncMate, which does all the hard work for you.

III. Sync Mac Contacts with Google [100% Working]

As well as photos, there may be times you need to sync other important data to Google Drive, like your contacts. If you’re somebody who updates their contacts regularly - for example, perhaps you attend business meetings or networking events, so need to ensure your contacts are up-to-date across all your devices - then regular syncing is important. Or perhaps you just want to make sure you have a copy of all your most important contacts in the cloud and on your Mac? We don’t blame you - there’s nothing worse than going to call someone and finding out your contact info is out of date. Here are a few of the best ways to sync contacts with Google.


1. How to Sync Contacts from Mac to Google for Free

SyncMate logo

SyncMate Expert


Requirements: macOS 10.13+. 60.62MB free space. Version 8.7.527. (5 Dec, 2023). 4.5 Rank based on 795+ users, Reviews(476)
Category: Utilities

Did you know you can sync contacts to Google from Mac for free with SyncMate? This powerful, professional sync tool makes it easy to sync your contacts without the risk of data loss, so your contacts will be backed up across your devices.
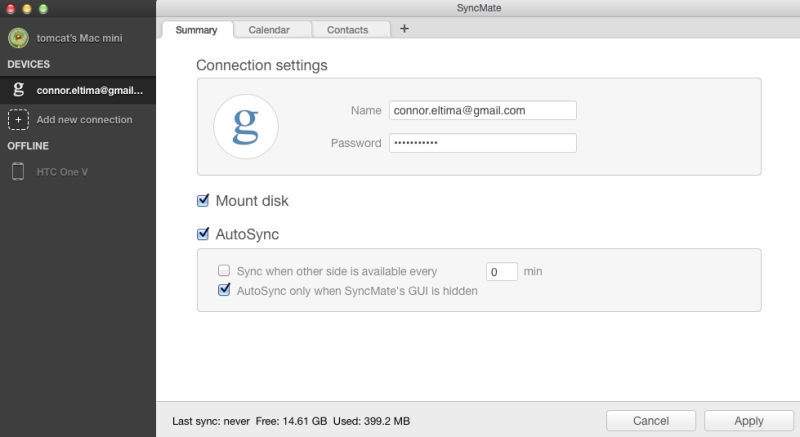
sync Google contacts

Here are the steps to follow to sync contacts from Mac to Google for free with SyncMate:

  1. Download and install SyncMate on your Mac.
  2. Launch the software and in the main window, click “Add New” in the left-hand menu.
  3. Select “Google Account” and log in to your Google account.
  4. Select the Contacts plugin and set your parameters - you can select all contacts or just specific ones.
  5. Don’t forget to set your sync direction, in this case from Mac to Google Drive.
  6. To start the sync, hit “Apply” to confirm your parameters, then “Sync”.
  7. The sync should start automatically.

SyncMate is designed to do all the hard work, so once you hit sync it should take care of everything and all you need to do is wait until the sync has completed.

2. Sync Mac Address Book With Google Automatically

If you’d rather sync your Mac Address Book automatically with Google without using a sync manager, there is a quick way to sync contacts to Google without downloading any software. Just follow the steps below to sync Mac Address Book automatically with Google:

  1. On your Mac, launch Address Book.
  2. In the menu, select “Preferences”.
  3. Under the “Accounts” tab, click “On My Mac”.
  4. Click “Configure”, then enter your Google email and password.
  5. Click “OK” and your Google account will be added to Mac Address Book.

That’s it! Now your Mac will automatically ensure your contacts are synced with Google in the future.

3. Use “Contacts Sync for Google Gmail” App for Mac

The third way to sync Google contacts with Mac is to use Contacts Sync for Google Mail. We’ll take you through the step by step below:
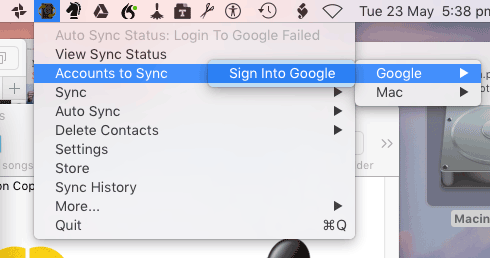
Contacts Sync for Google Mail app


  1. Download and install Contacts Sync for Google Mail from the Mac app store.
  2. Launch the software and go to “Accounts to Sync”.
  3. Enter your Google account and Mac iCloud account details.
  4. Select “Sync”, then choose from three options:
    • • Gmail -> iCloud deletes iCloud contacts and imports Gmail contacts.
    • • iCloud -> Gmail deletes Gmail contacts and imports iCloud contacts.
    • • 2-way sync merges all your contacts (so they’ll be the same on all devices).

That’s it! You can select “Auto Sync” to keep the app running in the background so that changes to your contacts are kept automatically synced if you like.

IV. How to Sync Google Calendar with Mac Calendar

As well as contacts and photos, your calendar holds some of the most important data that you’re definitely going to want to backup. You might want to sync iCal to Google Calendar so that your most important work appointments and meetings are synced across all your devices, or perform a Google calendar sync so that you make sure everything is up to date ahead of a busy month of personal appointments and social events. Whatever your reasons for needing to sync your calendars, we’ll explain how to sync Google Calendar and walk you through three of the best ways to do it.

1. Free Way to Sync Mac Calendar with Google

One of the best - totally free - ways to sync Mac Calendar with Google is to use SyncMate. This powerful app is designed specifically for Mac, and it’s a one-stop sync calendar solution.
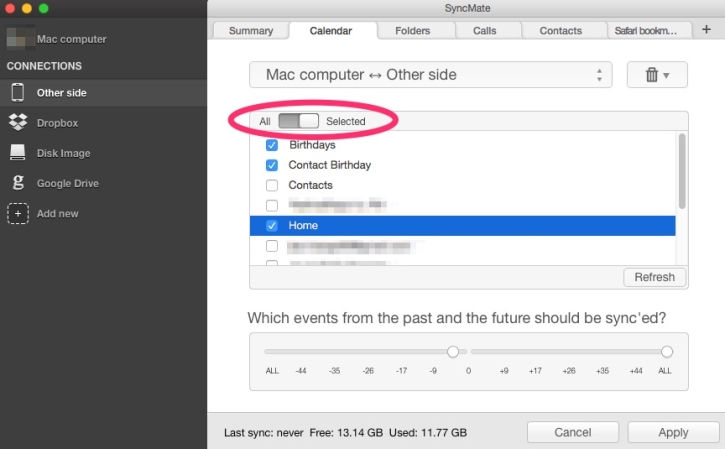
sync Google Calendar


Follow the below steps to sync your Mac Calendar with Google using SyncMate:

  1. Download and install SyncMate on your Mac.
  2. Launch the software and in the main window, click “Add New” in the left-hand menu.
  3. Select “Google Account” and log in to your Google account with your email address and password.
  4. Select the Calendar plugin and set your parameters - you can select all available calendars or just specific ones, depending on your requirements.
  5. Set your synchronization timeline and choose which past and future events to sync.
  6. Don’t forget to set your sync direction, in this case from Mac to Google Drive.
  7. To start the sync, hit “Apply” to confirm your parameters, then “Sync”.

That’s it - your sync should start automatically and SyncMate will take care of everything while you sit back and wait. It should only take a few seconds but may take longer if you have a lot of appointments.

2. Sync Google events with Apple Calendar

Of course, some people prefer to manually sync Google Calendar with Mac. If you don’t want to download and install a sync manager, you can perform the sync manually through your Mac, by following some simple steps. Our step-by-step guide below will walk you through the process for manually syncing Google events with Apple calendar:

  1. On your Mac, open Apple Calendar and select “Calendar” then “Preferences” (in the top left corner).
  2. Select the “Accounts” tab, then click “+”.
  3. Select Google -> Continue.
  4. Add your Google account login and password, following the steps onscreen.

You can set how often you want Apple Calendar to sync with Google Calendar by selecting “Refresh Calendar” in the Accounts tab.

3. Use Web App to Sync Google Calendar with Mac

Our third and final way to sync iCal to Google Calendar is using SyncGene. This free app lets you sync your Google Calendar with Mac quickly and easily.
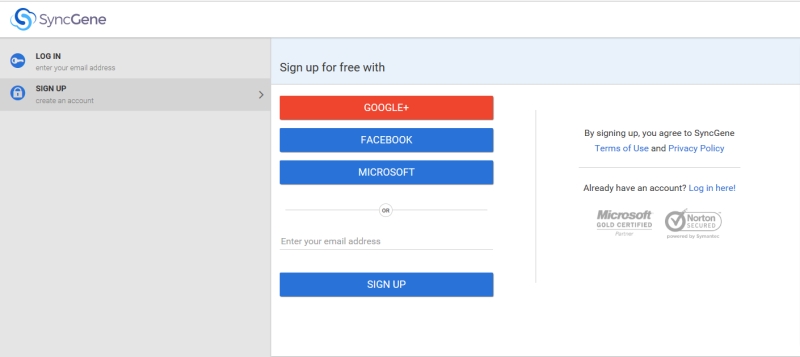
SyncGene app


Here are the steps you need to follow:

  1. Go to the SyncGene site and sign up for a free account.
  2. Once you’ve done this, select the “Add Account” tab and choose Google, then sign in to your Google account.
  3. Then repeat the steps but this time choose Mac and log in to your Mac account.
  4. Under the “Filters” tab, choose the “Calendar Sync” option. Select the folders you want to sync.
  5. Click “Save” then “Sync all” and your sync should start.

The app will send you a notification when your calendars will be synced.

V. Sync Google Bookmarks to Mac - Nothing is Easier

What’s the one thing you may want to sync that we haven’t yet covered? Bookmarks! Many of us collect thousands of bookmarks at home and at work, for everything from favorite recipes to how-to videos and resource sites for research at the office. Whatever you’re bookmarking and whether your bookmarks folder has 50 or 5,000 bookmarks, you’ll want to sync it to Mac to keep all your precious bookmarks backed up and safe. We’ll explain how to sync Google bookmarks to Mac and walk you through three excellent ways to do this quickly and easily.


1. Try SyncMate to Sync Google Bookmarks with Mac

SyncMate logo

SyncMate Expert


Requirements: macOS 10.13+. 60.62MB free space. Version 8.7.527. (5 Dec, 2023). 4.5 Rank based on 795+ users, Reviews(476)
Category: Utilities

If you’re looking for a professional, reliable way to sync Google bookmarks to Mac, you can’t go wrong with SyncMate. This tool minimizes your risk of data loss and handles all the hard work for you.
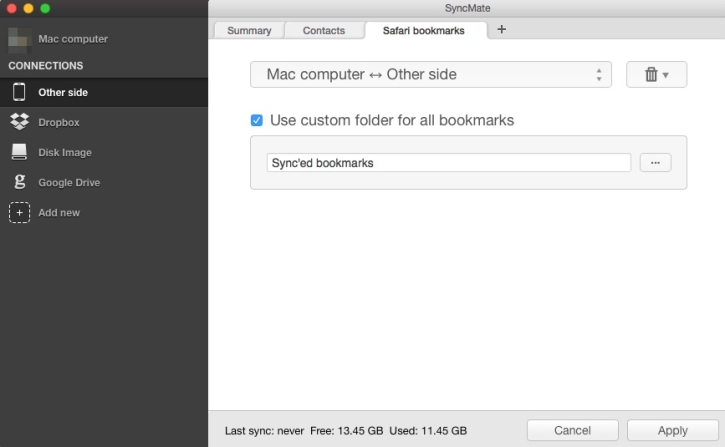
sync bookmarks

Here’s how to perform a Google Chrome sync of your bookmarks using SyncMate:

  1. Download and install SyncMate, then upgrade to the Expert edition.
  2. Launch SyncMate and click “Add New” on the left-hand menu in the main window.
  3. Select “Google Account” and log in to your Google account.
  4. Select the Bookmarks plugin.
  5. Set your parameters for your sync. To set a custom directory for your synced bookmarks, check the “Use custom folder for all bookmarks” box (bookmarks usually sync to the root directory).
  6. Don’t forget to set your sync direction.
  7. Click “Apply” to confirm your parameters, then hit “Sync” to start the sync.

If you need to sync bookmarks on Mojave (10.14) with other devices, there are a few additional steps you’ll need to follow to grant full disk access. You’ll find these explained here.

2. Sync Chrome Bookmarks to Safari Manually

Manually syncing may be the easiest option if you don’t want to download a sync management tool. Here’s how to sync Google bookmarks to Safari manually, step by step:

  1. Open Chrome on your Mac and click the three dots at the top right.
  2. Select “Bookmarks” then “Bookmark Manager”.
  3. Click “Organize”.
  4. Select “Export bookmarks to HTML file” then save the file to your Mac.
  5. Open Safari.
  6. Click “File”, select “Import from” in the drop-down menu, then click “Bookmarks HTML File”.
  7. Navigate to where you saved the HTML file and select it, then click “Import”.

You should now see your bookmarks in a new folder at the bottom of your sidebar.

3. Sync Bookmarks to Mac with One Bookmark

Our final option for syncing bookmarks to Mac is using a tool called One Bookmark, which lets you sync all your bookmarks from different browsers on Mac with Google.
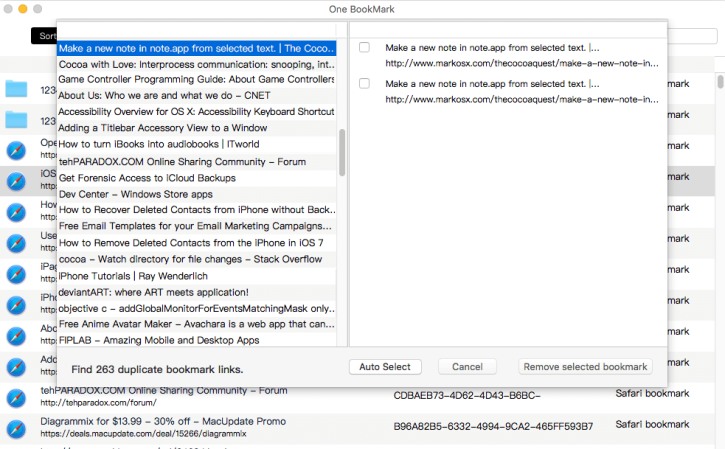
One Bookmark App


Here are the steps to follow to do this:

  1. Download and install One Bookmark.
  2. Run the software and select “Manage All Bookmarks” to display a list of all your bookmarks from all your browsers.
  3. To sort your bookmarks (by name or host), click the “Sort Bookmarks By” button.
  4. Create a new folder by clicking “New Bookmarks Folder”, then click “Move to Bookmarks Folder”.
  5. Click “Export Bookmarks” and your bookmarks from all browsers will be saved.

This HTML file can then be imported into any browser.

VI. How to Sync Data between Google and iCloud Accounts

There are times when you may need to sync data between your Google and iCloud accounts. You might want to backup photos to iCloud so you can view them on your Apple devices or your Mac, or perhaps you want to sync calendar appointments from Apple Calendar to Google using iCloud. One of the best ways to do this is by using a professional, reliable sync management software like SyncMate. It’s totally free to sync your contacts and calendars, but for other data, you’ll need to upgrade to the Expert edition.
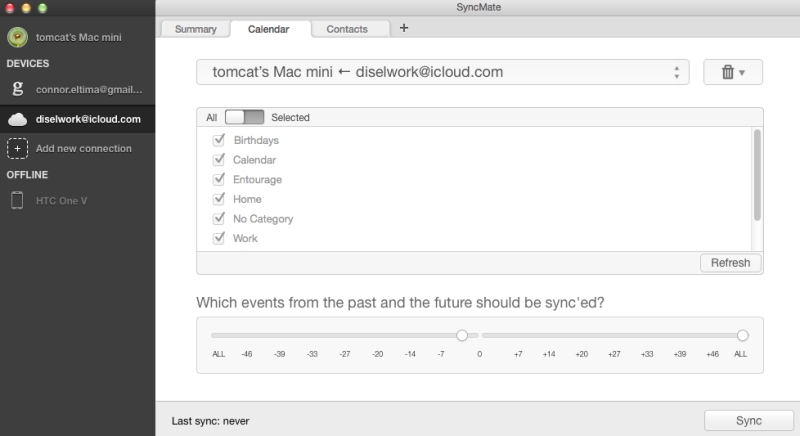
Sync Google Data


Follow the below steps to sync your data:

  1. Download and install SyncMate.
  2. Launch SyncMate and click “Add New Device”, then choose “iCloud Account”.
  3. Enter your login and password and click “Connect”.
  4. Choose the Contacts or Calendars plugin, set your sync parameters (set sync direction as iCloud to Mac, and select what you want to sync).
  5. Hit “Sync” and your data will sync to your Mac.
  6. Once it’s finished, follow step 2 but this time choose “Google Account”.
  7. Follow steps 3 and 4, this time setting your sync direction as Mac to Google.
  8. Hit “Sync” to sync your data to your Google account.

This shouldn’t take more than a few minutes, depending on how much data you’re transferring.

VII. FAQs

If you’re using Backup and Sync to sync Google Drive, try quitting the app and restarting it. Make sure you’re logged into your Google account with the correct details and check your Firewall settings aren’t causing an issue. If you’re using SyncMate, you can access customer support here.
You can sync Google account with Mac manually, using a tool like FreeFileSync, or using professional sync management software like SyncMate. If you’re not confident with tech, using sync management software handles the whole syncing process for you from start to finish.
The quickest and easiest way to sync Dropbox with your Mac is to use sync software like SyncMate. All you need to do is download and install the software, enter your account details for Dropbox, and let the software take care of the rest!
When it comes to how to sync Google Calendar with your Mac the answer is simple: either use a free professional software like SyncMate, sync your calendar manually, or use a downloadable free web app like SyncGene. We always recommend using professional software, as it’s simple to use and easier to get help if you encounter any issues.
Yes! You can use SyncMate to sync all your data, like contacts, calendars, photos, videos, bookmarks, files, and more from Google to Mac. It’s free to sync your contacts and calendars using SyncMate, and you can upgrade to the Expert edition to sync other types of data.

When performing a Google sync to backup your data to Mac, or vice versa, we’d always recommend using professional software you can trust. The last thing you want is to lose your precious photos, contacts, calendar appointments, or other data while performing manual sync. Using a sync manager like SyncMate makes the whole process quick and easy while minimizing the risk of data loss. At the end of the day, choose the option that works best for your needs and budget (SyncMate allows you to sync calendars and contacts for free) - and make sure you sync your data regularly so you don’t lose precious information!

SyncMate Expert

4.5
Requirements: macOS 10.13+ ,
60.62MB free space
Version 8.7.527 (5 Dec, 2023) Release notes
Download Total downloads: 467,673
Purchase PRO From $39.95
Rank based on 795+ users, Reviews(476)